TUTORIAL Sound design
Auto Sample on the MPC: the complete guide to building a keygroup from a real synth
Plug a synth into the inputs, set a note range, and the MPC plays and records every note by itself, then hands you back a mapped keygroup patch. No sixty individual takes, no naming each sample by hand. Here is every field in Akai's Auto Sampler window, the physical hookup that actually works, and a spot where the manual's own wording quietly changed between the last two Standalone OS releases.
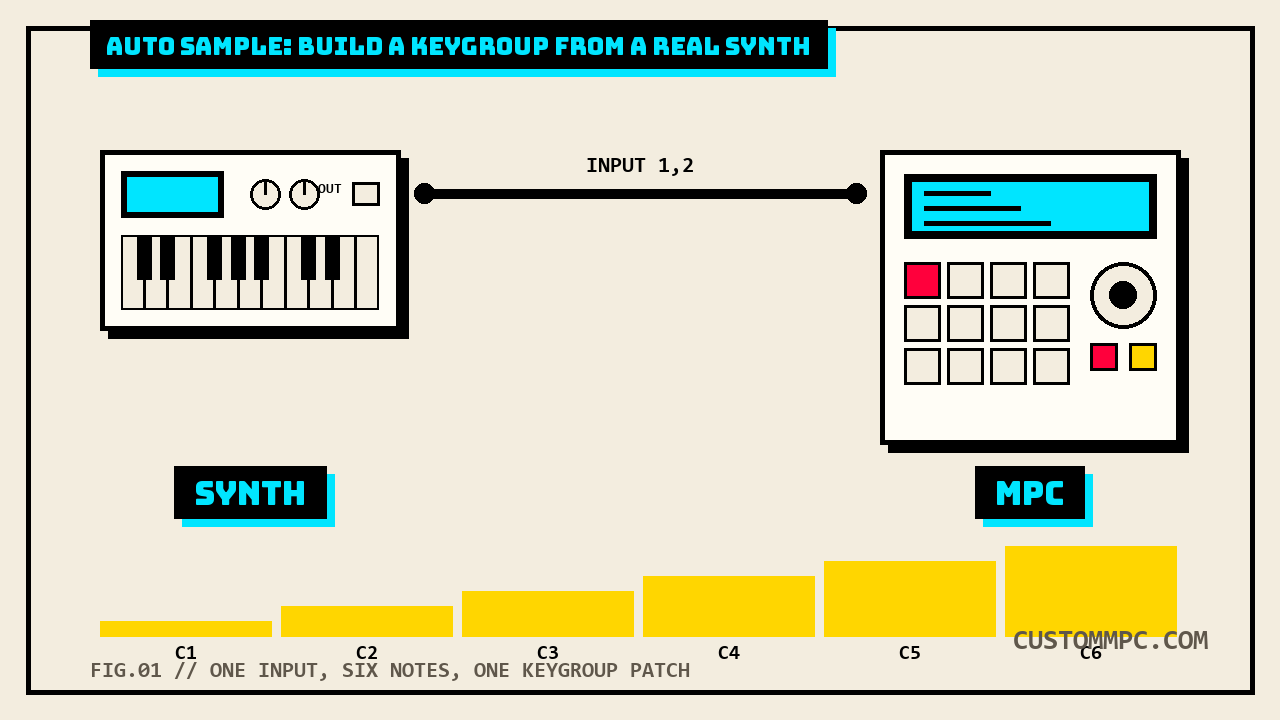
The short version
Auto Sample lives inside the Sampler page on every current standalone MPC and is officially called the Auto Sampler. It captures and converts a plugin preset or an external instrument preset into a keygroup sampler patch on its own, playing and recording each note in a range you set instead of you doing it by hand, one pad at a time. You open it by tapping the keyboard icon next to the record button in Sampler View, and it works from an input jack for hardware or a Resample source for anything already running inside the MPC. Set a Min Note, a Max Note, and how many semitones apart each sample should land, pick how many velocity layers you want, hit record, and walk away. The MPC comes back with a full keygroup, root notes and all, ready to play.
SOUND DESIGN NOTE: the entire pitch of this feature is speed. A hardware synth with a hundred factory patches used to mean a hundred manual recording passes if you wanted it playable across the keyboard instead of pitch-shifted off one sample. Auto Sample turns that into a note range, a velocity count, and one button. Judge it the same way you'd judge any expansion pack: how fast does it get you from silence to a beat you can actually play.
What Auto Sample actually builds
Auto Sample is not a second sampler bolted onto the MPC's regular recording tools. It lives on the same Sampler page as the four manual capture methods, Sample, Slice, Pad Tap, and Pad Hold, and shares the same input chain, gain staging, and Inserts effects with all of them. The difference is what comes out the other end. Sample, Pad Tap, and Pad Hold all end with you naming one recording and assigning it to one pad, over and over, for every note you want playable. Auto Sample ends with a finished keygroup patch, root notes set automatically per sample, velocity layers already split, because you told it the range up front instead of hitting record sixty separate times. It captures two kinds of source: a plugin preset already loaded on a track inside the MPC, or an external instrument plugged into the hardware inputs, which is the case this guide walks through start to finish.
Connecting the hardware first
Auto Sample runs through the same input path as every other recording method on the Sampler page, so the setup is identical to any external hardware sampling session. Drop your levels before you touch a cable: reduce the volume on your audio source and on your speakers, headphones, or monitors before making any connections, to avoid pops or feedback. Connect the synth or other line-level source to the input or inputs on your MPC hardware, then set your recording level with the gain knob, which is named differently depending on the model: 3/4 Rec Gain on MPC X, Gain on MPC Key 61, and Rec Vol on MPC Live, Live II, One, One G2, Key 37, and Key 37 G2. Play the source, watch the meter, and keep it under the point where it's constantly peaking. These are the same three steps every hardware sampling session on an MPC starts with, Auto Sample doesn't skip any of them, it just takes over everything downstream of a good input level.
| Model | Input gain control |
|---|---|
| MPC X / MPC X Special Edition | 3/4 Rec Gain |
| MPC Key 61 | Gain |
| MPC Live, Live II, One, One G2, Key 37, Key 37 G2 | Rec Vol |
Opening the Auto Sampler
Open the Sampler first, either from Menu, tapping Sampler, from a dedicated Sampler button or Shift combo depending on your model, or by selecting an empty pad on a Drum Track in Main Mode and tapping the Record icon in the Track Section. From inside the Sampler, tap the keyboard icon next to the record button to open the Auto Sampler window itself, and whatever track was selected when you tapped it becomes the auto sample source by default. The Auto Sampler window is organized into clearly labeled blocks, Sample Source Information, Note Range, Velocity, Sampling, Looping, On completion, and Info, and every field in this guide below is one of those blocks.
Setting the sample source
Sample Source Information is where you tell the MPC what it's actually listening to. The Track name field selects the target auto sampler source, and Record from selects the specific input to record from. This is the field that decides whether you're capturing hardware or something already inside the box: pick one of the Input options to auto sample an external instrument through the audio jacks, or one of the Resample options to auto sample an internal source, like a plugin track's own output, without ever leaving the digital domain. For a hardware synth or drum module, that means one of the Input options tied to whichever jacks you connected it to during the hookup above. Resample is the path for capturing an MPC plugin's preset into a static, playable keygroup instead of keeping it loaded and CPU-hungry, worth knowing exists even if this guide's own hookup below uses the Input path.
Note range, velocity layers, and sample length
The rest of the window is where you actually design the capture. Note Range sets which notes get sampled at all: Min Note and Max Note bound the range, Note Stride sets how many semitones apart each new sample lands, and an Extend min/max notes checkbox overrides both bounds to sample all the way to the instrument's real lowest and highest notes regardless of what you typed into Min Note and Max Note. Velocity decides how many dynamic layers the finished patch gets: check the boxes for however many of the eight available layers you want, then set a velocity value for each one, so a soft hit and a hard hit on the same pad can trigger genuinely different recordings instead of one sample just turned down. Sampling covers the length and naming of what gets recorded: Note length sets how many seconds each note plays for, Tail adds extra seconds on top to catch reverb tails, delay throws, or long one-shot decays that would otherwise get chopped off mid-ring, and Base name sets the naming convention every resulting sample file uses.
| Section | Field | What it controls |
|---|---|---|
| Sample Source Info | Track name | Which track is the target auto sampler source |
| Record from | Input jacks (external) or Resample (internal) | |
| Note Range | Min Note / Max Note | The lowest and highest note that gets sampled |
| Note Stride | Semitones between each new sample | |
| Extend min/max notes | Overrides both bounds, samples to the instrument's real range | |
| Velocity | Layers 1-8 | How many velocity layers the patch gets |
| Velocity value | The velocity each checked layer records at | |
| Sampling | Note length | Seconds each note is held and recorded |
| Tail | Extra seconds added for reverb, delay, or long decays | |
| Base name | Naming convention for every resulting sample |
Looping the captured samples
Every sample Auto Sample records can loop, and Enable looping controls how. Off means the sample never loops. Forward means holding the pad repeats playback from the Loop Position to the end of the sample, releasing it stops the repeat. Reverse plays that same stretch backward, from the end of the sample to the Loop Position, again for as long as the pad is held. Alternating plays forward to the end, then backward to the Loop Position, back and forth, repeating the whole time the pad stays down. Loop start and Loop end sliders set where in the sample that loop actually happens, Crossfade sets how many seconds of blend sit between the loop's end and its start, and Crossfade Type picks Equal Power or Linear as the blend curve.
| Enable looping | What holding the pad does |
|---|---|
| Off | Nothing loops, the sample just plays once |
| Forward | Repeats Loop Position to end while held |
| Reverse | Repeats end to Loop Position, backward, while held |
| Alternating | Bounces forward then backward between the two points while held |
Running the capture and what happens on completion
Two more fields decide what happens once the auto sampling run finishes. Under On completion, checking Make current track loads the finished keygroup patch as your current track automatically, so the pads you're looking at are already the ones you just built. Under Info, the Session Duration field gives you an estimate of how long the whole capture is going to take before you commit to it, useful math when a run means Min Note through Max Note at whatever Note Stride you picked, times however many velocity layers you checked, times Note length plus Tail, back to back. That estimate is worth actually reading before you tap record. A wide range, a tight Note Stride, and multiple velocity layers multiply fast, and Auto Sample is going to sit there and play, record, and wait out the full Note length plus Tail on every single one of them without you touching a thing. Set it up, check the Session Duration, then go do something else while it works.
- Connect and gain-stage the synth using the three setup steps above: levels down first, cable into the input, gain knob dialed in against the meter.
- Open the Auto Sampler from Sampler View's keyboard icon, and confirm Record from is set to the Input option matching your connection, not a Resample option.
- Set Min Note, Max Note, and Note Stride to match the instrument's real range, or check Extend min/max notes to let the MPC find the edges itself.
- Pick your velocity layers under Velocity. One layer is faster to capture; more layers means a patch that actually responds differently to how hard you hit the pad.
- Set Note length and Tail long enough to catch the instrument's full decay, especially on anything with reverb or delay baked into the patch itself.
- Check Session Duration under Info before you commit, then record.
Common mistakes and quick fixes
Mistake: leaving Record from set to Resample when sampling hardware. Resample pulls from an internal source, not the input jacks. If your synth is plugged in and nothing is being captured, or you're capturing silence, check that Record from is actually set to the Input option tied to your connection, not left on a Resample default.
Mistake: setting Note length too short for the patch. A pad synth or anything with a long release will get cut off mid-decay if Note length and Tail together don't cover the actual sound. Akai's own recommendation is to run at least a couple of seconds of Tail on anything with reverb, delay, or a long one-shot decay, more if the patch is genuinely ambient.
Mistake: skipping the gain-staging steps because Auto Sample feels automated. Auto Sample runs through the exact same input chain as manual sampling. If your levels are wrong, or you skipped reducing your monitor volume before connecting a live synth, that mistake gets baked into every single note in the range, not just one take you can throw out and redo.
Mistake: not checking Session Duration before hitting record. A wide Min Note to Max Note range, a fine Note Stride, and several velocity layers stack into a genuinely long unattended run. Read the estimate first so you're not walking back into the room forty minutes early or forty minutes late.
A note on manual versions
Rule two on this site is that conflicts between sources get stated, not quietly resolved. This one is small but real: the v3.7 Standalone OS guide contradicts itself in the exact same sentence, twice, on two different pages. The Sampler chapter's opening summary (page 286) correctly says the Auto Sampler lets you "capture and convert any plugin preset or external instrument preset into a Keygroup sampler patch." But the dedicated Auto Sampler section eight pages later (page 294) reprints nearly the identical sentence with a typo: "capture and covert any plugin preset or external instrument preset into a keygroup sampler patch." Covert instead of convert. The v3.9 guide fixes it. Both mentions, the chapter summary on page 296 and the dedicated section on page 304, now read "convert" consistently. It's a one-word typo fix, not a functional change, but it's a real, checkable difference between the two printings and this site's rule is to say so rather than silently pick the version that reads cleaner.
The page numbers themselves moved by a clean, consistent offset across this entire chapter, which is worth noting because it isn't always true elsewhere in the manual. The Sampler chapter heading sits on page 286 in v3.7 and page 296 in v3.9. The Auto Sampler section itself sits on page 294 in v3.7 and page 304 in v3.9. The Looping subsection that follows it sits on page 295 in v3.7 and page 305 in v3.9. The next chapter, Q-Link Edit, sits on page 296 in v3.7 and page 306 in v3.9. Four anchor points, all shifted by exactly ten pages, no drift. If you're cross-referencing an older cached copy of the manual against this article, add ten to any page number in this Sampler chapter to land on the same content in v3.9.
Verdict: is it worth the wait
VERDICT
Have a hardware synth or module worth mapping properly: yes, without question. Connect it, gain-stage it the normal way, set a Note Range and Note Stride that match its real playable range, pick at least two velocity layers if you care about dynamics, check Session Duration, and let it run. Only need one or two one-shots: skip it, manual Pad Tap or Pad Hold is faster for a single sample. Capturing a CPU-hungry internal plugin preset to free up voices: use the Resample path under Record from instead of Input, same window, different source. The whole feature exists to trade your time for the MPC's patience. Let it be patient.
Run an Auto Sample session worth sharing? Tell us what happened.