GUIDE Tempo matching
Time stretch and warp on the MPC: the complete guide
Every sample was recorded at some tempo, and your beat is almost never at that exact tempo. Akai gives you four separate tools for closing that gap without touching pitch: a one-time destructive process in Sample Edit, a live adjustable Warp function on Audio, Drum, and Keygroup tracks, a Flatten step that renders the stretch down to a plain file, and an optional FFT-based algorithm in the Pro Pack. This is what each one actually does, every field, checked page by page against Akai's own manual.
The short version
Akai's own glossary cross-references Time-Stretch straight to Warp, as if they're the same feature wearing two names. In the actual software they aren't interchangeable, and knowing which one to reach for saves you a redo. Time Stretch lives in Sample Edit Mode and is destructive: you set a Beat count, a New Tempo (or a Ratio, they drive each other), and MPC permanently rewrites the sample at the new length. Warp lives on Audio, Drum, and Keygroup tracks and is nondestructive: it stretches playback live, at whatever BPM your project is currently set to, and you can change your mind about the tempo as many times as you want without ever re-processing the source file. Flatten takes a warped, edited arrangement and renders it down to one clean audio file once you're happy with it, optionally through a higher-quality algorithm called Elastique Pro. Super Warp is a fifth option on top of all this, an FFT-based algorithm that ships with the paid MPC Pro Pack and gets set as your project's default warp algorithm from Preferences. Four tools, one job: get the sample to your beat's tempo, not the other way around.
RIO'S NOTE: nobody teaches this in order, so most people learn Warp first because it's the button staring at them in Track Edit Mode, then get confused later when Sample Edit's Time Stretch process asks for completely different fields and doesn't have an undo the way Warp does. They're not competing features. They're a live tool and a permanent one, and you want to know which is which before you commit a stretch you can't take back.
Why this matters for every pack you own
A drum one-shot doesn't carry a tempo, it just fires when you hit the pad, which is why none of this matters for most of what's on a pad. It starts mattering the second you're working with anything that has a beat baked into its own length: a chopped break, a vocal phrase, a full loop pulled off a record, a bounce you recorded in a different project last year at a different BPM. That file was captured at whatever tempo felt right in the room, and your current beat almost never lands on that same number. Pitch it up or down with the Semi/Fine knobs alone and you change the key along with the speed, which is fine for a special effect and wrong for almost everything else. Time Stretch and Warp exist specifically to break that link: change the length, keep the pitch. This applies to any loop-based or tempo-locked content you load onto an MPC, ours included down the line. None of the packs on this site right now are built from loops, Starter Rack 001, Dust Sector Vol. 1, and Low End Archive are all one-shots and keygroup-mapped notes, so nothing in them needs stretching on its own. But the second you record a phrase over one of them, sample a break to sit under them, or reuse a bounce from an older project, you're back in Warp and Time Stretch territory, and the workflow below is the same regardless of whose sample it is.
Time Stretch: the destructive one-shot fix
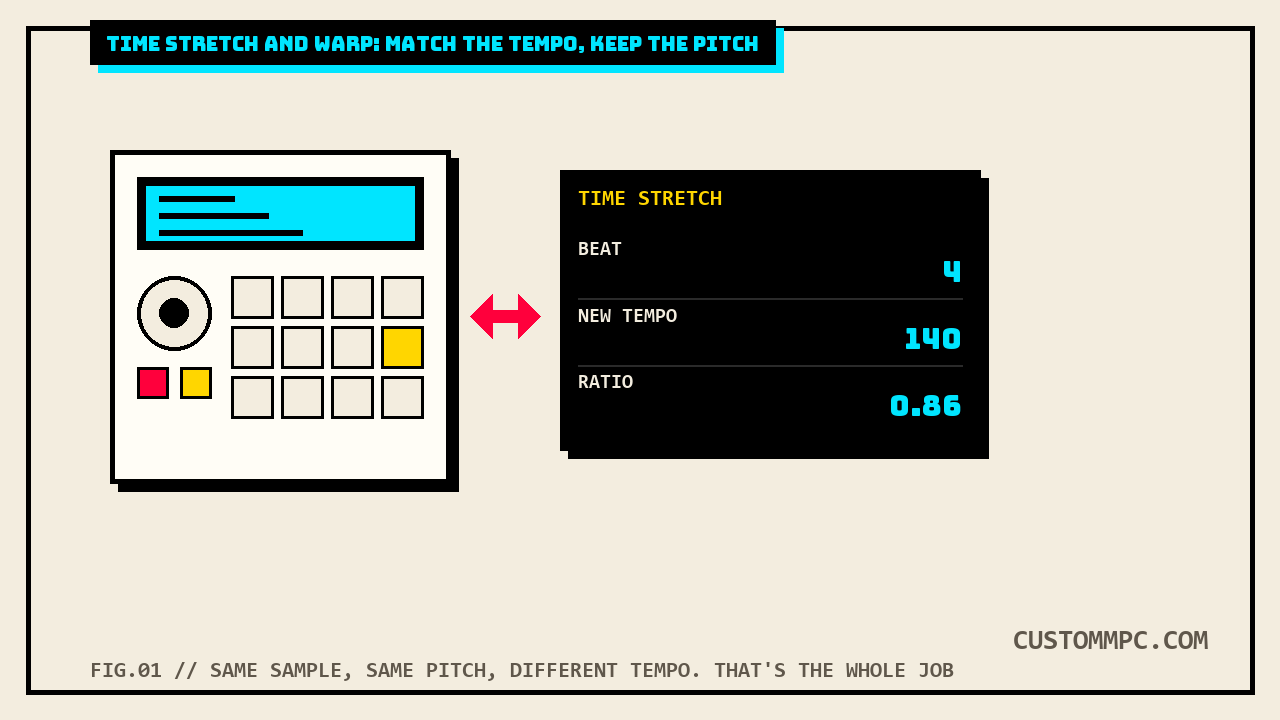
Time Stretch is one of the processes inside Sample Edit Mode, sitting right next to Pitch Shift, Gain Change, and Copy. It lengthens or shortens the sample without changing its pitch, and Akai frames it specifically as a duration-matching tool between two samples. Three fields drive it, and only two of them need your input:
| Field | What it does |
|---|---|
| Beat | Sets the number of beats the selected region represents |
| New Tempo | Sets the tempo you want the sample stretched to. The Ratio field updates automatically to show the resulting stretch factor |
| Ratio | Can be edited directly instead: set the ratio you want and New Tempo recalculates to match |
The two fields are linked in one direction from whichever one you touch: enter a New Tempo and Ratio recalculates, or enter a Ratio directly and New Tempo recalculates instead. Either way, this is a bake-it-in move: once you run it, the sample itself is now a different length at a fixed pitch, permanently, unless you keep a copy of the original around first. That's the tradeoff for the destructive path. It's the right call for a sample you're locking into one project forever and never touching again at a different tempo. It's the wrong call for anything you might reuse across multiple projects at multiple BPMs, which is where Warp earns its keep instead.
Warp on Audio tracks
On an Audio track, Warp lives in Audio Region Edit Mode. Tapping Warp on the selected region enables the Semi, Fine, and BPM fields next to it, and from there you're stretching the region live, not committing anything permanently to the file on disk. Type a BPM directly and the region's length changes to match, or let MPC find the tempo for you: tap Detect BPM to open the Edit BPM window, where you can enter a value manually, tap Detect to analyze the region automatically, or tap Tap Tempo and hit it at the rate you want. Semi and Fine handle pitch on top of that, useful if you're matching two samples that were recorded in different keys as well as different tempos, and the Algorithm field lets you override the project default and pick Pro Ten or Repitch for this specific region. Warp algorithms are genuinely CPU-heavy, and Akai's own manual is direct about it: minimize pitch adjustment, avoid warping tiny regions, and keep the total number of simultaneously warped tracks or regions low, especially when several of them start at the same instant. If you record straight into an Audio track, MPC embeds the project's current tempo into the file at the moment of recording, and that stored tempo is what the Warp algorithm compares against your current BPM field to calculate the stretch factor later, whether that's minutes or months down the line.
Warp on Drum and Keygroup tracks
Drum and Keygroup tracks warp per layer, from the Samples/Oscs tab of Track Edit Mode, and the field set is close to the Audio track version with one meaningful difference: a BPM Sync toggle sits above Warp. Turn on both BPM Sync and Warp and the sample's tempo locks to the project tempo automatically. Turn on Warp alone, with BPM Sync off, and the sample stretches independently using whatever value you set in the Stretch field, decoupled from the project's own tempo. Warp itself is a simple on/off here: enabled, and lengthening or shortening the sample by BPM leaves pitch untouched; disabled, and length and pitch move together the way a plain speed change always has. The Algorithm field here has one more option than the Audio track version: Default, Pro Ten, or Repitch, where Default explicitly means "whatever the Preferences setting currently says," and picking either named algorithm directly overrides that Preferences value for this one layer only. The same CPU cautions apply, plus one this manual only spells out on the Drum/Keygroup side: avoid rapidly triggering samples that are warped, since every retrigger of a warped layer is its own real-time stretch calculation, not a cached result.
The Default Audio Warp Algorithm and Auto Warp
Both warp fields above default to whatever's set under Menu > Preferences > Audio/Export > Default Audio Warp Algorithm, and that setting is a straightforward two-way choice: Pro Ten or Repitch. Repitch behaves differently from Pro Ten in one important way, warping a sample with Repitch selected will also adjust its pitch to bring it into sync with the MPC's tempo, where Pro Ten changes length while holding pitch fixed. Right below it in the same Preferences tab sits Audio Track Auto Warp, off by default behavior otherwise: switch it on and any audio region you record gets warped to the current project tempo automatically the moment you record it, so you can change the project's BPM afterward and the region tracks along instead of drifting out of time. These two Preferences settings are the reason the per-region and per-layer Algorithm fields exist at all: they're always overrides, never the whole story, and if you've never touched a warp Algorithm field on a specific track, it's quietly inheriting whatever you set here.
Flatten, Flatten Elastique, and Flatten Pad
Warp is live, which means it costs CPU every time playback touches it. Flatten is the release valve: it renders a track's edits and regions down to one plain audio file so the machine stops recalculating the stretch on every pass. On Audio tracks specifically, Flatten and Flatten Elastique do the rendering with transport stopped, baking all the edits and regions in the current arrangement into a single new audio file. The difference between the two is quality versus speed: Flatten Elastique specifically runs any time-stretching or pitch-shifting through the Elastique Pro algorithm, which Akai states produces higher-quality results with fewer artifacts than the standard algorithm used by plain Flatten. Drum and Keygroup tracks get their own version, named Flatten Track and Flatten Track Elastique instead, doing the identical job (render the arrangement's edits and regions to a new file, optionally through Elastique Pro for higher quality) under a track-scoped name. There's a third, narrower tool worth knowing if you're specifically fighting CPU load on a Drum track: Flatten Pad, reached from a dedicated icon in Track Edit Mode's Samples/Oscs tab. It renders every sample on the selected pad, at full velocity, after the pad's own channel strip, down to one audio sample on the first layer, including the results of any warping and any pad insert effects already applied. Akai frames it directly as a CPU-saving move: once a pad is flattened, its samples no longer need to be warped in real time, because the warp is now baked into the rendered audio. It's Drum-track only, it doesn't work on Keygroup tracks. Both Warp field sections above point straight at this function as their own recommended fix: if you have warped samples used in a drum kit, use Flatten Pad to consolidate the affected pad's layers into one sample so it no longer needs warping.
Super Warp: the Pro Pack's FFT algorithm
The MPC Pro Pack, Akai's paid add-on bundle, includes a third algorithm option beyond Pro Ten and Repitch: Super Warp, described as high-quality, FFT-based time stretching and pitch shifting. It's turned on the same way as the other two: open Preferences, go to the Audio/Export tab, and set Default Warp Algorithm to Super. Once set, that choice saves and recalls with the project, track, or program files, same as Pro Ten or Repitch would. FFT stands for Fast Fourier Transform, a different underlying math approach from the time-domain stretching Pro Ten and Repitch use, and it's the same general family of algorithm behind a lot of studio-grade time-stretch plugins outside MPC, which is the practical reason to reach for it: better results on difficult material (long stretches, full mixes, vocals) at the cost of more CPU per voice, the same tradeoff every high-quality warp algorithm makes somewhere.
Common mistakes
Mistake: reaching for Time Stretch on a sample you'll reuse at other tempos. Time Stretch bakes one specific tempo into the file permanently. If there's any chance you'll want the same sample at a different BPM later, warp it on the track instead and leave the source file alone.
Mistake: assuming the Preferences Default Audio Warp Algorithm still only offers two choices once Pro Pack is installed. See the sources note below, this is a real gap in how the manual describes its own setting.
Mistake: warping a dozen simultaneous layers and wondering why playback stutters. Warp algorithms are explicitly called out as CPU-intensive in every section that documents them. Keep the number of simultaneously warped voices low, avoid warping very small regions, and rapidly retriggering warped samples is its own separate caution on the Drum/Keygroup side.
Mistake: leaving a finished beat full of warped tracks instead of flattening it. Once you've settled on the tempo and you're not changing it again, Flatten (or Flatten Track, or Flatten Pad for a single Drum pad) renders the stretch to a plain file and frees up the CPU that was recalculating it on every playback pass.
Mistake: expecting Repitch and Pro Ten to sound identical. They aren't the same algorithm doing the same math with different names. Repitch adjusts the sample's pitch to lock it to the MPC's tempo as part of the process; Pro Ten changes length while holding pitch fixed. Try both on a difficult sample before assuming the default is the right call for it.
A note on sources
Every technical claim above is checked directly against Akai's Standalone OS User Guide, Manual Version 3.9: the Time Stretch process in Sample Edit Mode on page 280, the Default Audio Warp Algorithm and Audio Track Auto Warp settings in Preferences > Audio/Export on page 63, the Audio Region Edit Mode Warp fields on page 171, the Drum/Keygroup Track Edit Mode Samples tab Warp fields on page 199, the Flatten and Flatten Elastique functions for Audio tracks on page 132, the Flatten Track and Flatten Track Elastique functions for Drum/Keygroup tracks on page 164, the Flatten Pad function on page 192, the Super Warp Algorithm section in the Pro Pack addenda on page 509, and the Warp glossary entry in the Appendix on page 387. Every one of those was cross-checked against Manual Version 3.7 and confirmed word-for-word identical in content, with the page numbers shifted: 270, 59, 165, 193, 127, 158, 186, 479, and 366 respectively. That's the same non-flat drift this site's own Q-Link knobs guide already flagged between these two manual versions, a small, uneven shift through the main body of roughly four to ten pages depending on the chapter, a much larger 30-page shift by the time you reach the Pro Pack addenda where Super Warp lives, and a 21-page shift by the Appendix glossary at the very end of the manual, which sits after the Pro Pack addenda in page order and inherits most of that accumulated difference. This article's own page counts corroborate that same pattern rather than re-deriving it from scratch: main-body sections moved by 4 to 10 pages between versions, the Super Warp section moved by 30, and the glossary moved by 21.
Every page number above was verified directly against the PDF, extracted one page at a time and matched against that page's own printed footer number rather than trusted from a single reference pass, since a page-by-page extraction like this one is easy to get off by one in either direction if you only check it once.
One real inconsistency in Akai's own documentation is worth stating plainly rather than smoothing over, per this site's standing rule that conflicts get disclosed, not silently resolved. The Preferences > Audio/Export description of Default Audio Warp Algorithm says, in both manual versions checked, "Select Pro Ten or Repitch," with no mention of a third option. Every per-track Algorithm field that references that same Preferences setting repeats the same two-option framing: the Audio Region Edit Mode Warp field says "Select Pro Ten or Repitch," and even the Drum/Keygroup Track Edit Mode field, which does add a third choice, only adds "Default" (meaning "inherit whatever Preferences says"), not "Super." But the Pro Pack's own Super Warp Algorithm section, a few hundred pages later in the exact same manual, instructs the reader to set that exact same Preferences field, Default Warp Algorithm under Audio/Export, to "Super." The Preferences section itself never gets updated to mention that a third value exists for a reader with Pro Pack activated. It's a real gap between two sections of the same document rather than a contradiction that changes what you should actually do (the instructions in the Pro Pack section are correct and match how the field behaves once Pro Pack is active), and it's worth knowing before you go looking for "Super" in the Preferences chapter and conclude the feature doesn't exist because that section never says so.
Verdict
VERDICT
Locking one sample into one project forever: use Time Stretch in Sample Edit. Set Beat and New Tempo (or Ratio directly), it's permanent, so keep a copy of the original if there's any doubt. Working live, or you might change your project's BPM later: use Warp on the track instead, Audio Region Edit Mode for Audio tracks, the Samples/Oscs tab for Drum and Keygroup tracks. Pro Ten changes length and holds pitch, Repitch adjusts pitch to lock in with tempo, pick based on the material. Done adjusting and the tempo's final: Flatten it, or Flatten Elastique for the higher-quality render, or Flatten Pad if it's specifically a CPU-heavy Drum pad you want to consolidate. Own the Pro Pack: Super Warp is worth trying on anything difficult, long stretches, full mixes, vocals, set it once in Preferences > Audio/Export and it applies as your new default everywhere Pro Ten or Repitch used to. None of this changes what a sample sounds like at its original tempo. It only changes whether it still sounds right at yours.
Found a warp setting or a Flatten trick worth sharing? Tell us what happened.