GUIDE Sound design
MPC Sample Edit Mode: trim mode and the process menu
Chop Mode gets all the attention because it's the fastest way from a loop to sixteen pads, and the site already has a full guide to it. What sits right next to Chop Mode inside Sample Edit Mode, and never gets its own page, is a second toolset built for a different job: Trim Mode for cropping and looping a sample before it goes anywhere near a pad, and a Process menu of more than a dozen destructive functions, Normalize and Reverse through a paid AI stem separator, that reshape the sample itself. Every field below, checked page by page against Akai's own manual.
The short version
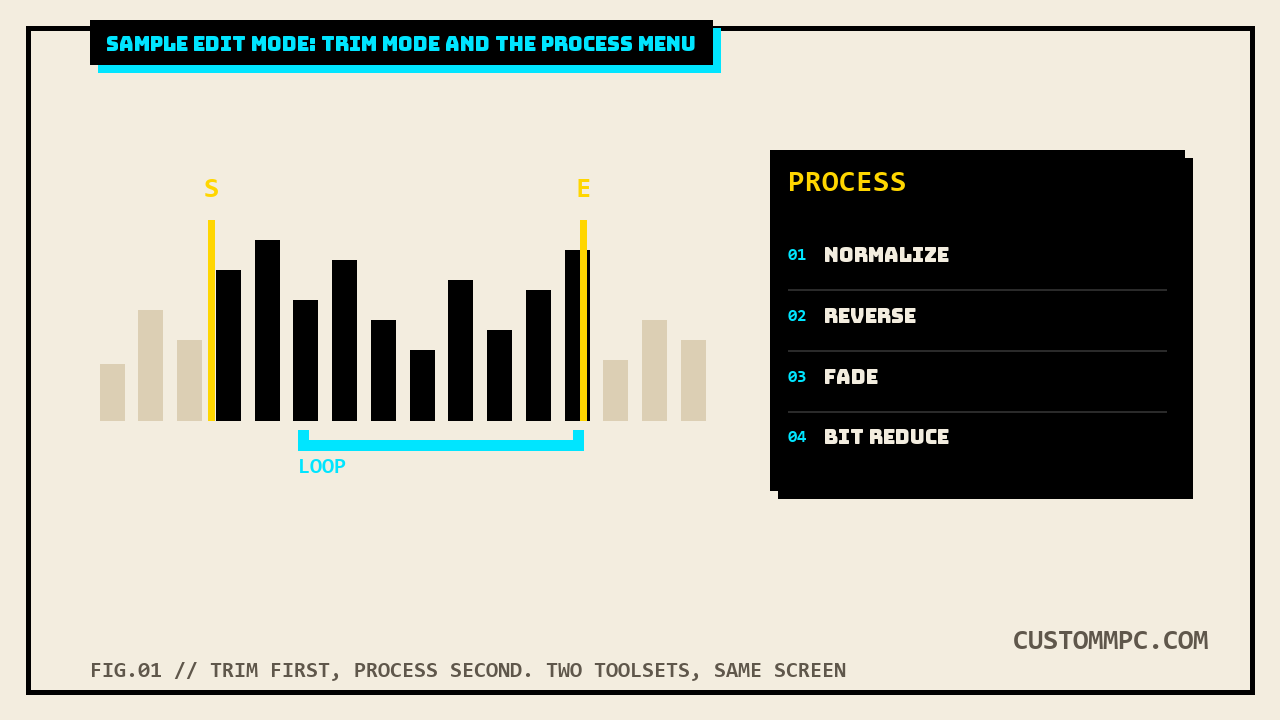
Sample Edit Mode is a single screen with two very different jobs living inside it. Akai's own manual describes it plainly: it lets you edit samples using various functions, entered from Menu > Sample Edit or a dedicated Sample Edit button on most hardware. The Trim/Chop button at the bottom of the screen switches between two toolsets sharing the same waveform view. This site already has a dedicated guide to Chop Mode, so it isn't re-covered here. What is covered here is everything else: Trim Mode, which crops a sample down to a start point and end point and can loop the region while you search for the right one, and the Process menu, a separate list of more than a dozen destructive editing functions, Discard, Delete, Silence, Extract, Normalize, Reverse, Fade In, Fade Out, Pitch Shift, Gain Change, Copy, Bit Reduce, Stereo to Mono, and Stems, reached by tapping Process from either Trim or Chop Mode. One function on that list, Time Stretch, already has its own full writeup on this site alongside real-time Warp, in Time Stretch and Warp on the MPC, so it's mentioned here only in passing.
RIO'S NOTE: most people find Trim Mode by accident, hunting for Chop Mode and hitting the Trim/Chop toggle one tap too early. Once you know it's there on purpose, it becomes the move for cleaning up a recorded sample before you ever get to chopping it, trim the dead air off the front, set a loop point while you audition where the sample actually starts sounding right, then flip to Chop and slice the part that's left. Skipping Trim and chopping a sample with three seconds of silence still attached just means every slice inherits that same silence.
Why this matters beyond Chop Mode
A pack built entirely from clean one-shots, tightly recorded, already at unity gain, never touches most of what's below. Real source material rarely arrives that way. A field recording has room tone before the transient. A vinyl rip has surface noise under everything. A vocal take from a phone has one word too quiet and the next one clipping. A drum loop pulled off an old record needs its stereo image collapsed to mono before it'll sit right in a kit next to synthesized one-shots. Trim Mode and the Process menu are the two tools built specifically for that gap between what you recorded and what actually belongs on a pad, and neither one requires leaving Sample Edit Mode or reaching for outside software to do it.
Trim Mode: Start, End, Loop, and X-Fade
Akai's own recommendation is direct: use Trim Mode to crop the start and/or end from a sample. Tap the Trim/Chop button at the bottom-left of the screen so it reads Trim, and two pages of parameters become available, paged through with the arrows on either side of the screen. Start and End fields set the crop points directly, or you can drag the S and E markers on the waveform, or turn the first two Q-Link columns (Start on the first, End on the second). A built-in loop function repeats the region between a loop point and the end point, which Akai frames specifically as an auditioning tool: useful for finding the ideal spot to begin the sample, and the loop point can never sit earlier than the start point. A Loop Lock toggle decides whether that loop point tracks the start point automatically or moves independently with its own marker, and the Loop button itself cycles through four playback modes.
| Loop mode | Behavior |
|---|---|
| Off | The sample will not loop |
| Forward | Restarts from the loop point every time it reaches the end point |
| Reverse | Plays in reverse from the end point back to the loop point, then returns to the end point and repeats |
| Alternating | Ping-pongs: reverse on reaching the end point, forward again on reaching the loop point |
An X-Fade field applies real-time crossfade looping on top of any loop with a nonzero starting point, with a Length in samples and a Type of either Equal Power or Linear, aimed at smoothing the seam where the loop restarts. The pads themselves double as an audition remote while you're in Trim Mode: sixteen dedicated playback functions across Pads 1-16, from playing the whole sample (Pad 9) to playing just the region before the loop point (Pad 14) to a continuous loop at whatever mode the Loop button is set to (Pad 16), with Pads 1-8 splitting into "One Shot" (press once, plays through) and "Note On" (press and hold, release to stop) versions of the same four transition points. A separate Tune/Root Note/BPM/Key block on the second Trim Mode page handles pitch and tempo metadata directly, including a Detect Key button and an X2/÷2 tempo-doubling shortcut, and 0 Snap (Shift + the 0 Snap button at the bottom of the screen) forces every point, start, end, and loop, to lock onto the waveform's zero-crossings, specifically to avoid clicks when the sample plays.
Assigning a trimmed sample to a pad
Trim Mode has its own Assign button, separate from whatever workflow you'd otherwise use to load a sample onto a pad, and it comes with a real destructive warning attached: assigning this way replaces the sample on the first layer of the target pad, full stop. The Assign To field is where the real decision happens. Assign slice to a pad points the pad at the underlying slice non-destructively, which keeps project clutter down since no new sample gets created, while New Sample to Pad actually creates a fresh sample from the trimmed region, with a Crop Sample checkbox that decides whether the unused parts of the original are discarded (destructive, project-original stays intact) or kept around for further editing later.
The Process menu: Slice vs. Sample scope
Tapping Process opens the Process window; the Function field selects which editing process runs, and double-tapping it (or tapping Function at the bottom of the screen) opens a Function window listing every available process at once. Before touching any individual function, one scope note governs almost everything on the list and is easy to miss: most processes only touch the region between the current start point and end point, but two are stated exceptions that always process the entire sample regardless of where those points sit, Bit Reduce and Stereo to Mono, and Discard is its own special case that inverts the usual logic, deleting the regions outside the start and end points instead of the region between them. That single note is the reason a Trim Mode start/end selection matters even for people who never touch the Loop or X-Fade fields: it's the scope box every Process function reads from, except for the two named exceptions.
Discard, Delete, Silence, and Extract
Four functions handle the basic shape of a sample, what stays, what goes, and what gets pulled out as its own new file. Discard deletes everything outside the start and end points, keeping only the selected region. Delete removes the region between the start and end points instead and closes the resulting gap, splicing what's left together. Silence replaces that same region with actual silence rather than closing the gap, which keeps the sample's overall length and timing intact, useful for muting one bad hit inside an otherwise-good loop without shifting everything after it. Extract does the opposite of Discard's destination: it deletes everything outside the start and end points, same as Discard, but saves the result as a brand-new sample in the project rather than editing the current one, with an Edit Name field for naming it. Akai's own tip for this one is a good real-world use case: record a drum loop, then Extract just the snare hit out of it to use separately.
Normalize, Reverse, Fade, Pitch Shift, and Gain Change
Normalize raises a sample's level to the loudest point possible without introducing distortion, which Akai describes as digital gain optimization: run it and you stop worrying about whether a sample with a wide dynamic range is quietly under-leveled next to everything else on the pad grid. Reverse flips the selected region backward, playback order only, this is not a pitch or tempo change. Fade In and Fade Out each apply a ramp across the selected region, and both share the same six available curve shapes.
| Curve | Shape |
|---|---|
| Linear | A straight line between the start and end |
| Square Root | A half-parabola, similar to logarithmic but steeper |
| Square | The opposite curve to Square Root, similar to exponential but steeper |
| Log | Rises quickly at the start, flattens toward the end |
| Exp | Rises slowly at the start, grows steeper toward the end |
| Sine | Rises slowly, steepens in the middle, flattens at the end, like a sine wave |
Pitch Shift changes the sample's pitch without touching its length, up to twelve semitones in either direction, with a direct quality warning attached: expect the audio quality to drop at the more extreme settings. Right next to it, Time Stretch does the inverse job, length without pitch, and gets the full page-by-page treatment in this site's own Time Stretch and Warp guide rather than repeated here. Gain Change is a separate, more permissive volume tool than Normalize: up to 18 dB higher or lower, and unlike Normalize it will let you push a sample past clipping level on purpose if that's the sound you're after. Copy simply saves a duplicate of the sample, auto-numbered if you don't rename it, a safety net worth running before any of the genuinely destructive functions above if you're not certain about the result.
Bit Reduce and Stereo to Mono
These are the two functions the manual explicitly calls out as full-sample processes, ignoring the start/end selection entirely, per the scope note above. Bit Reduce lowers a sample's bit resolution down to as little as 1 bit, permanently degrading its fidelity on purpose. Akai's own comparison is to the Resampler effect, with one real difference: Bit Reduce commits the change to the sample itself rather than applying it live. Stereo to Mono converts a stereo sample down to a new mono sample, saved separately rather than overwriting the source, with three collapse options: Left channel only, Right channel only, or Sum, combining both channels into one.
Stems: the paid AI separator
The last function on the list is the odd one out: Stems isolates individual musical elements out of a full mix and separates them into new stem samples, a fundamentally different job from every trim/level/pitch tool above it. Four elements are selectable: Vocals, Bass, Drums, and Other (keys, guitars, and anything else that doesn't fit the first three). A Track dropdown sets where the results land, and an Assign to Pad option decides whether the separated stems go straight onto the first four layers of a chosen pad or into the general project sample pool instead. A Use trimmed sample checkbox controls whether the separation runs on just the Start/End-selected region or the whole file. Stems is genuinely paid, not bundled in: Akai's own note directs you to akaipro.com/stems to purchase it, then to a Preferences menu to activate the purchase, and that activation path is one of two real, disclosed wording changes between manual versions, covered below.
Common mistakes
Mistake: running Bit Reduce or Stereo to Mono on a trimmed selection and expecting only that region to change. Both are explicitly full-sample processes per Akai's own scope note. If you only want the crunch or the mono collapse on part of a sample, Extract that part into its own new sample first, then run the process on the extracted file.
Mistake: reaching for Delete when you actually wanted Silence. Delete closes the gap and shifts everything after it earlier in time; Silence keeps the sample's length and timing exactly as it was. Mixing these up on a multi-hit loop will throw off every hit that comes after the edited region.
Mistake: never running Copy before an experimental Process pass. Every function on this list except Extract, Copy, and Stereo to Mono edits the sample in place with no separate undo step described anywhere in this section. Copy is free, instant, and exists specifically so you can try something destructive without losing the original.
Mistake: confusing Gain Change with Normalize. Normalize finds the loudest possible level without clipping and stops there automatically. Gain Change is a blunter tool, a manual up to 18 dB in either direction that will happily push a sample into clipping if you ask it to. They solve different problems.
A note on sources
Every technical claim above is checked directly against Akai's Standalone OS User Guide, Manual Version 3.9: the Sample Edit Mode entry point on page 269, Settings on page 271, Trim Mode across pages 272-275, Assigning Samples on page 276, and the full Process menu (Discard through Stems) across pages 277-281. Every one of those was cross-checked against Manual Version 3.7 and confirmed word-for-word identical in content, with a single, completely flat 10-page shift across the entire chapter: page 269 to 259, 271 to 261, 272 to 262, 276 to 266, and 277 to 267, all exactly minus 10, no exceptions found anywhere in this chapter. That's a notably cleaner pattern than the non-flat, chapter-by-chapter drift this site's own Time Stretch and Warp guide and Q-Link knobs guide already documented elsewhere in the same manual, roughly 4 to 10 pages in the main body but 21 to 30 pages by the time you reach the Pro Pack addenda and Appendix. Sample Edit Mode sits early enough in the manual, well before those later additions, that its own internal page count never had to absorb any of that later growth.
Two real, disclosed wording changes did turn up between the two manual versions, both caught by direct page-by-page diff rather than assumed identical from the flat offset alone, per this site's standing lesson that a page shift being flat doesn't mean the content is. First, the hardware list attached to entering Sample Edit Mode and to a Q-Link shortcut inside Trim Mode both grew between versions: v3.7 names MPC X, MPC One, MPC Key 61, and MPC Key 37; v3.9 adds MPC One G2 and MPC Key 37 G2 to the same two lists, the same kind of hardware-list growth this site has now confirmed independently on at least two other articles. Second, per house rule 2, the exact menu path for activating a purchased MPC Stems license changed its own name between versions: v3.7's Sample Edit intro and Stems process description both point to Menu > Preferences > Activate Plugins; the identical two spots in v3.9 point to Menu > Preferences > Activations instead, the same destination under a renamed menu entry, confirmed at both citation points independently rather than assumed from one. Every page number above was verified directly against the PDF, extracted one page at a time and matched against that page's own printed footer number, not trusted from a table of contents or a single reference pass.
Verdict
VERDICT
Cleaning up a rough recording before you chop it: Trim Mode first, Start/End/0 Snap to crop the dead air, the Loop function to audition where the sample should actually begin. Cutting out one specific hit: Extract, it saves the result as its own new sample rather than editing in place. Muting a bad hit without shifting timing: Silence, not Delete, Delete closes the gap and moves everything after it. Leveling a pack before you ship it: Normalize for automatic, clip-safe leveling; Gain Change only if you want to push past clipping on purpose. Lo-fi texture: Bit Reduce, remembering it processes the entire sample regardless of your Start/End selection. Pulling a vocal or drum layer out of a full mix: Stems, the one function on this list that's genuinely a separate paid purchase, activated from Menu > Preferences > Activations. None of these functions require leaving Sample Edit Mode, and Copy is free insurance before you run any of the genuinely destructive ones.
Found a Process function or a Trim Mode field worth adding here? Tell us what happened.